Annealing Silver: Why and How To Do It
Welcome to the fascinating world of silversmithing! If you're a beginner exploring jewelry making and metalworking, you've probably heard the term "annealing." It sounds a bit technical, but it's a crucial step in working with silver, and understanding it will dramatically improve your results. This article will break down why annealing is important and how to do it safely and effectively.
What is Annealing?
Simply put, annealing is a heat treatment process used to soften metal. Silver, especially in its work-hardened state (after repeated hammering, bending, or drawing), becomes brittle and difficult to shape. This brittleness is due to changes in the metal's internal crystal structure – a phenomenon called work hardening. Annealing reverses this process. It allows the silver to return to a more workable state, making it easier to shape, solder, and form intricate designs. Before you even get to the annealing process, ensuring you have the right essential silversmithing tools is key to a successful project.

Why Anneal Silver?
Here’s why annealing is vital for successful silversmithing:
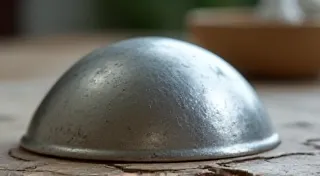
- Improved Workability: Makes silver much easier to shape and form without cracking or breaking. This is especially important when embarking on complex designs or trying techniques like dome bending – see forming silver: dome bending basics for more detail.
- Reduced Brittleness: Prevents silver from becoming too brittle, which can lead to frustrating and costly mistakes.
- Easier Soldering: Softened silver is more forgiving when soldering, reducing the risk of joint failure. Understanding the nuances of understanding and using silver soldering will further enhance your results.
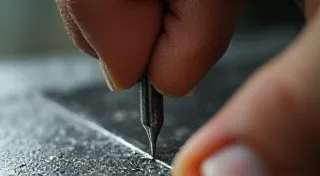
- Better Detail: Allows for finer detail to be achieved when hammering or stamping.
How to Anneal Silver: A Step-by-Step Guide
Annealing silver might seem daunting, but with the right precautions and a little practice, it's quite manageable. Here's a simple guide for beginners:
- Gather Your Materials: You’ll need your silver piece, a small container (like a fire-resistant dish or a piece of charcoal), tongs, and ideally, a kiln or torch. Ensuring you have the correct tools will make the process smoother and safer.
- Heat the Silver: Using a torch, heat the silver piece evenly. The color change is your guide. You're aiming for a dull cherry red color. If using a kiln, follow the temperature guidelines for annealing (typically around 600-700°F / 315-370°C). The even distribution of heat is key to successful annealing; uneven heating can lead to warping or stress cracks. Understanding the principles of heat transfer in metalworking can be incredibly beneficial.
- Quench the Silver: Once the silver reaches the cherry red color, immediately quench it in water. This rapid cooling is what allows the metal to regain its flexibility. The quenching process is essential for ensuring the silver returns to a workable state.
- Observe the Color Change: The color change is the most important aspect. If the silver doesn’t turn cherry red, it hasn’t been heated enough. If it turns black, you’re overheating it. The blackening indicates oxidation; while it can be cleaned off, it’s a sign that the silver was exposed to excessive heat.
Let's delve deeper into the science behind annealing. Work hardening, as mentioned earlier, occurs because the metal's crystal lattice is distorted by repeated deformation. When you hammer or bend silver, the crystal structure isn’t perfectly aligned; instead, dislocations are introduced, hindering the metal's ability to slide past each other. This makes it brittle and prone to fracture. Annealing provides the necessary thermal energy to allow these dislocations to move and rearrange themselves, restoring the crystal structure to a more relaxed and workable state. The higher the degree of work hardening, the more pronounced the effect of annealing.
Beyond the Basics: Different Annealing Methods
While the torch method is the most common for beginners, there are other annealing approaches:
- Kiln Annealing: Offers more precise temperature control, ideal for larger pieces or production work.
- Salt Annealing: Uses a bed of salt to create an inert atmosphere, preventing oxidation and achieving a brighter finish. This method is more advanced and requires more specialized equipment and knowledge.
- Sugar Annealing: Similar to salt annealing, but utilizes sugar as the inert medium.
Safety Precautions!
Annealing involves high heat, so safety is paramount. Always follow these precautions:
- Wear Safety Glasses: Protect your eyes from sparks and flying debris.
- Ventilation: Work in a well-ventilated area to avoid inhaling fumes. Fumes, especially from burning charcoal or sugar, can be harmful.
- Heat-Resistant Gloves: Protect your hands from burns.
- Fire Extinguisher: Keep a fire extinguisher readily accessible.
- Never Leave Heat Unattended: Always supervise the annealing process.

Troubleshooting Annealing Issues
Even with careful attention, you might encounter some challenges. Here are a few common issues and how to address them:
- Silver Turns Black: Indicates overheating and oxidation. Reduce the torch flame or decrease the annealing time. Ensure adequate ventilation.
- Silver Remains Brittle: Means the silver wasn’t heated sufficiently. Increase the annealing time or flame intensity.
- Warping: Often caused by uneven heating. Rotate the piece during the annealing process to ensure even heat distribution.
Annealing in Relation to Other Silversmithing Processes
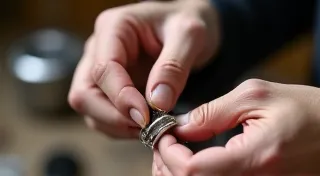
Annealing isn't a standalone process; it's often integrated into a larger silversmithing workflow. For example, if you're planning to create a ring, you’re likely to anneal the silver before shaping it, then again after soldering the components together. Similarly, when undertaking a project like your first silver ring, annealing is a vital step that ensures you can achieve the desired result. Consistent annealing throughout the project is key to preventing cracking and maintaining the silver's workability.
Practice Makes Perfect
Annealing is a skill that improves with practice. Start with small pieces of scrap silver to get a feel for the process and observe the color changes. Don’t be discouraged if your first attempts aren't perfect. With a little patience and attention to detail, you’re well on your way to mastering this essential silversmithing technique! Remember, the more you practice, the better you'll become at recognizing the subtle color changes and understanding how they relate to the silver’s workability.